Hints and Teasers
Helpful Hints 1
by Lew Buller
Creating Jin, Creating Shari, Creating Root-over-Rock, Hollow centers in the root ball, Over-pot and Under-pot, The fingernail test, Trim deadwood
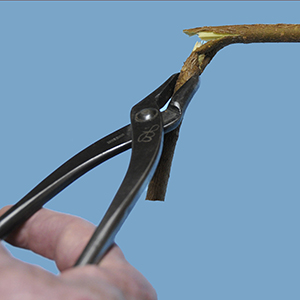
Creating Jin
You will get better results if you use jin pliers to create a jin on a live branch. Dead branches tend to break off squarely, not leaving the pointed tip that would result from a natural break. Do not create jin arbitrarily. It looks very strange to see a dead branch sticking out from an otherwise perfectly healthy green mass of foliage. You can use concave cutters to split the stub further. Or you can squeeze the end of the branch with the jin pliers, causing it to split and fray.
Creating Shari
Don’t attempt to create the entire shari at one time. Choose the location on the trunk for the shari, mark the limits of the shari, and mark the limits of the initial cut using a marker of a different color. Remove a thin sliver of bark, starting lower than you eventually want the shari to start and stopping well above the point where you want it to end, definitely above the root line. You may be able to incorporate a spot where a branch was removed and left a scar. Let the tree recover and then remove another section of bark, slightly increasing the size. Repeat this process as many times as is necessary to create the size and shape of shari that you want. Optional: When the shari is done, use lime sulfur (now sold as jin seal, if available) to control decay but avoid getting it on the live cambium as it is likely to damage it.
Never take the shari down to the roots.
Creating Root-over-Rock
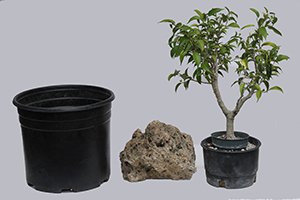
Choose a stone that is rough and has crevices. Using a smooth stone leaves the roots with few places to find purchases. Pick out a tree that forms large, substantial roots. Avoid junipers as their roots are fine and never thicken much underneath the soil. Then choose (or make) a growing container large enough to hold the stone and deep enough to enable you to bury both stone and tree roots beyond the existing root growth. Plastic growing pots work well as you can gradually cut them open and let soil wash away.
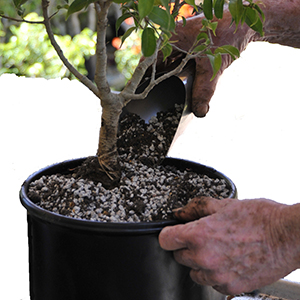
At the end of the air-layering write up, I asked “How would you remove the small inner pot, knowing it still has a bottom?” The green pot fit at a point on the tree where a large top could be removed, but it was not large enough to sustain the top. When cut off, it went into a half-gallon pot as a way to keep the air layer from falling over and to provide space for much more root growth.
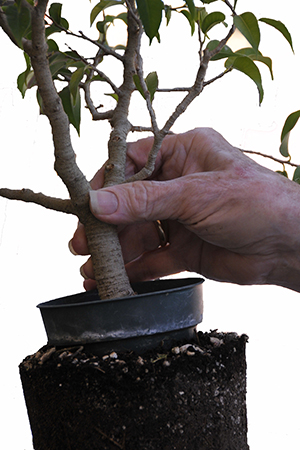
That’s the tree we will use to create a root-over-rock, so let’s take it apart. First thing, remove the tree from the half-gallon outer pot. Then remove the outer layer of soil, knowing that roots have probably grown through the bottom of the pot and escaped into the outer ring. Loss of some of the roots won’t kill a ficus. You might want to keep this double pot idea handy as it is way to grow a large trunk but still leave you with a small enough root mass that you can move it directly to a bonsai pot.
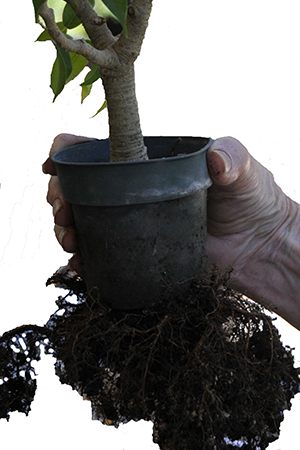
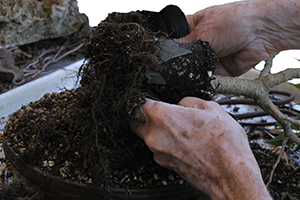
The green pot was cut off with a pair of rusty scissors that I use for such purposes. Down the sides first, then across the base, and finally across the bottom. Most of the roots are still intact, but there are far too many to fit over the stone.
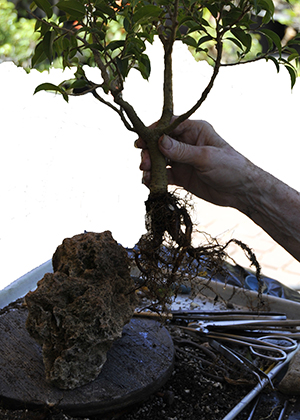
Bare root the tree and trim its roots to fit over stone. Ficus are one of the very few trees whose roots can stand such rough handling. The process would be safer if I had used a much smaller tree and planted it on the stone earlier. If you can do this and set the pot aside in the garden for several years, that would be the smart thing to do. I’m pushing the boundary to see what the ficus will do.
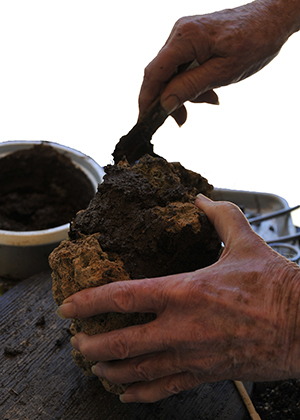
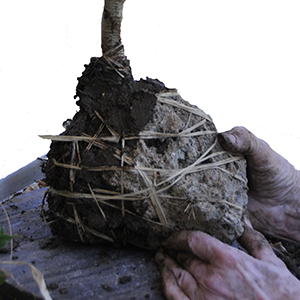
Cover the stone with a layer of muck (clay and cut-up sphagnum moss). Remember, if roots are not in contact with soil or other moist rooting media, they will dry up and die. When the stone is covered with muck, set the tree in place and tie it there with a biodegradable twine or raffia, tying it tightly enough to hold the roots close to the stone. Raffia will degrade over time.
Some people have covered the roots with a cut-up plastic sack and counted on the weight of the surrounding soil to force the roots against the stone. There is a risk the roots will die if they are not allowed to come into contact with bonsai soil.
Once the roots are fully established and a broad root base developed that will hold the stone erect in a bonsai pot, the excess soil is no longer needed. That’s why the plastic pot is later split slowly down the side and the soil allowed to wash out a little bit at a time, so the larger roots at the top can get used to no soil while the ones further down are still nourished by the soil. The flat root base at the bottom of the pot should continue to be covered as the roots here will support the tree in the future. I have set stones in concrete to create broad stable bases.
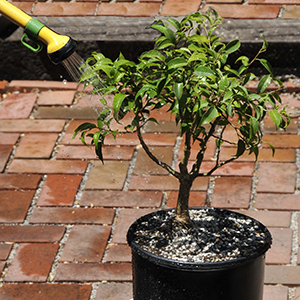
Fill the growing container with bonsai soil and water the combination. Over time, let the bonsai soil wash away to expose the roots. This may take several years.
Hollow centers in the root ball
If a large taproot or a series of smaller roots is removed from the center of an otherwise healthy root ball, it may create such a deep hole that soil will not be forced into it when the tree is set in the pot. In that case, hold the tree upside down, pack the void with bonsai soil, use the other hand to cover the soil and hold it in place. Then quickly invert the tree, keep the covering hand in place until the last second, remove it, and set the tree down in the pot.
Why go to the trouble? Roots that are not in contact with soil die, creating at the least a shortage in intake of nutrients and at the worst, beginning a rot process that will be harmful.
If a root base is broad and no further roots come out of the center, then no bonsai soil is needed at that location. Instead, use a smooth stone to fill the center void. It will shed water, reducing the chances of having rot at the center of the tree.
Don’t over pot; Don’t under pot
If you over pot, the soil stays wet and cold and the roots don’t get the heat they need to grow. If you under pot, the roots may burn if the plant is in the sun and the tree will soon be root bound. Generally speaking, roots stop growing when the temperature of the soil in the pot exceeds 85° F. What’s the happy medium? Bonsai wisdom says use a pot about 2/3rds to 3/4th of the spread of the canopy and this should be the correct pot. Cascades and semi-cascades take into account not only the width of the pot but also the depth to get the volume necessary to maintain the tree roots in good condition.
The fingernail test
Often a tree will appear dead, but before you throw it away, make a quick check. Use your fingernail to scratch the bark very carefully, continuing to work on down to the cambium. If it is green there, the tree is alive and just needs TLC. If it’s brown, test another location or two and if they are also brown, give the tree a decent burial. Actually I don’t bury. San Diego has a recycling center and I save my clippings, dead trees, branches removed and any other greenery and take them there.
Trim deadwood at any time
Unless it is part of the design, a dead branch can be removed at any time. Cut the tree flush with the trunk and seal it to keep the surrounding cambium from drying out. If you have a large branch to remove, save the branch; and use bark from the branch to cover cuts. I collect small pieces of bark in an old prescription bottle in my tool box and fasten them on with Elmer’s Carpenter’s Wood Glue. The glue is also an all-purpose seal for cuts on nearly every tree except the Floss Silk Tree (Chorisia speciosa) that forms its own seal and the various ficus that exude latex to cover wounds.