Know Your Tree
Ligustrum Japonicum ‘Texanum’
by Lew Buller
The Internet has a number of articles on the use of privets in bonsai. Some are developed in Chinese style as befits a Chinese privet; most deal with oversized old hedgerow stumps, and many attempt to sell you a privet. Probably the most useful is Zach Smith’s “Chinese Privet as Bonsai” in the ABS Journal, Summer 1990, Volume 24, Number 2, pp. 8-10.
The closest thing to a hedgerow privet I found came from an old nursery in the Pacific Beach area. The owner had dug the trees many years ago, stuck them in the back of the nursery, and because neither landscapers nor bonsai artists had found them of any interest, the trees were not transplanted but rather left in the original window box. I paid $35 for them, took them home, and proceeded to find out what kinds of roots they had.
They survived the surgery and went into separate pots. They would need more surgery, a great deal of carving to reduce the old trunks to a size proportional to the branches and leaves. The one thing I knew was that any carving should be done in stages and it should stop way above the soil level. With no leaves to support roots if the cuts were made clear to the ground, the roots would die and the process of trunk rotting would begin. I had neither the skill not the tools to do the carving, so after a while I did the prudent thing and planted them in the ground.
This does not mean that I gave up on all hedge plants, just on the large ones. My wife and I have lived for more than 20 years just down the hill from a shopping plaza that has privet hedges in front of stores. I have been tempted to take a tile shovel and make a midnight requisition from that hedge. For those of you who have never have been in the Army, that means taking something without permission when you have a good chance of not being caught. The hedges have been there since before we moved in and even now are not much more than up to my knee. They are sheared regularly and that accounts for their dense growth and the fact the fact that I almost never see blooms on them. Don’t judge size of tree by size of leaf; in a pot, the leaves will come down significantly.
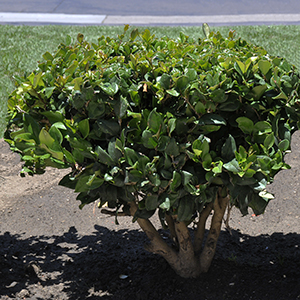
The best plants are those collected from hedges that have been kept short, as nursery plants tend to be thinner and straighter. Roots can be trimmed severely when collecting; the top can be cut back and new branches and leaves will sprout from adventitious buds. Best time to collect is early spring, but take them at other times if you have no choice.
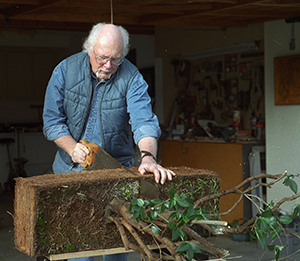
Bruce Hisayasu in Pasadena, CA received a medal from the Japanese government for his contributions to bonsai in the U. S. Bruce and his wife, Yaeko, imported Japanese bonsai pots and dozens if not hundreds of bonsai enthusiasts bought pots from them. When Bruce first came to the U. S., he did what many of his countrymen did and became a gardener. He picked up many an overgrown landscape plant from his customers and sold them to customers who may have come in for pots and saw plants they liked. That’s the origin of the Japanese privet clump I have.
It’s clear the clump was removed from a hedge. The center of the clump was rotten. I had no idea how privet would respond to cutting away dead wood nor how the roots would respond to transplanting. Nevertheless I decided to take out the dead center, trim the roots, and put it in San Diego bonsai soil. I did not make the soil excessively heavy as privet is subject to Texas root rot.
You can imagine my relief when I saw it break out in new leaves. It sprouts back from adventitious buds but sprouts slowly and sparsely on old wood and it may send up suckers. I cleaned up the stubs–they were old–hoping that the cambium would grow over the clean surface. Instead, it only formed a small ring around them. I don’t recommend lime sulfur on any surface where healing is wanted.
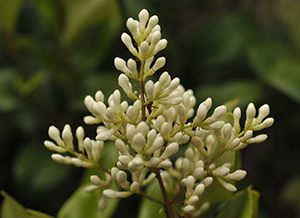
Privet bonsai must be left untrimmed in the spring to flower, otherwise, trim it to retain shape. I generally trim but sometimes let it flower. The leaves will reduce to 1 1/4 to 1 ½ inches in length.
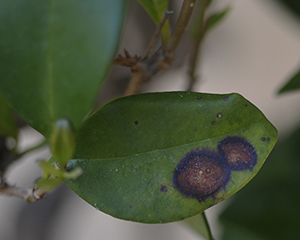
On January 8, 1998 my wax-leaf privet was defoliated. Moss from the stones near Lake Wohlford was added to the soil and fertilizer cubes of cottonseed meal, Ironite , and blood meal were added to stimulate green top growth. All leaves with black spots were removed, leaving only a few tiny new leaves. Privets can catch black leaf spot from roses, so keep them away from roses with leaf spot. Treat black spot by defoliating in early spring and not watering the foliage as the leaf spot spores are spread by water on the leaves. Elsewhere I said that I regularly water the foliage on my bonsai; my privets are an exception. The black spot in the photo appears to be out of focus; it is not; the margins of the fungus are very soft and fuzzy. Proof? The white spot at the center of the larger spot is in focus; the photo is life-size.
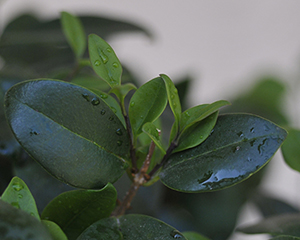
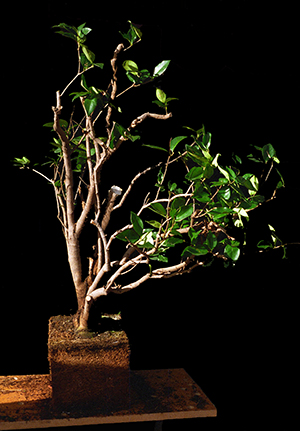
As new leaves continue to enlarge and send out longer shoots, the shoots should be pinched or broken off with tweezers after the first two leaves. The exception: the beginnings of branches you want to let grow. This appears to stimulate new buds on the branch and ramification; the process continues all through the months of leaf growth, regularly as leaves become out of balance with your design Leaves grow in opposing pairs; cut the center branch long and leave the two opposing leaves to sprout new branches from the axils; later select one of the two branches to keep and cut the other. Branch diameter increases slowly after the tree is potted. Note: The water drops on the leaves tell you why this privet is also called the wax-leaf privet.
This clip-and-grow method is the best but it will not result in curves as growth is angular. Curves can be created if the branches are wired with aluminum wire; be careful as branches may split at the forks. They are somewhat stiff to bend.
Every two years in the spring as the first flush of growth started I transplanted it. I fertilized it in spring, summer and fall using a variety of fertilizers, mostly low in nitrogen. Slower growth results in shorter internodes and a denser foliage mass. The clump was cut apart with a chisel and individuals trunks were replanted in different positions. The wood and roots are extremely hard; early on, it was necessary to saw the roots off. Roots can be severely pruned; they will regrow in a year, but care should be taken to leave roots around the perimeter of the tree. Roots do not need seal; they will callous over cuts. Eventually a flat root system was developed so it could be planted in a shallow bonsai pot.
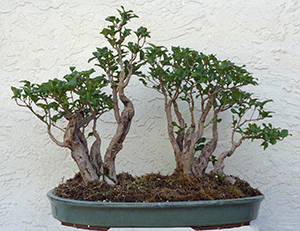
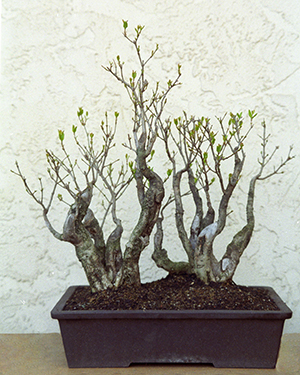
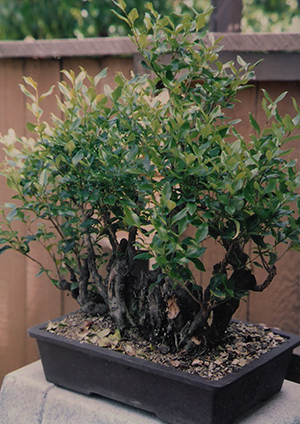
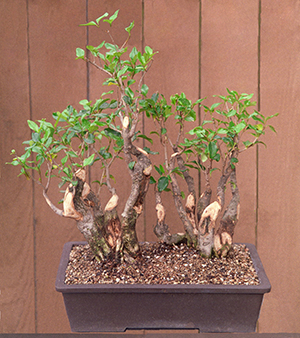
As the privet continued to grow, I decided it should be further developed in a bonsai pot. Look carefully at this photo and then compare it to the two photos of the clump at different stages. The small tree at the center in those two photos has now been turned 180o and moved to the right side of the right hand grouping. A couple of visiting experts from Hawaii suggested the change and the separated tree got a complement from a Los Angeles expert: “It is a perfect little tree.”
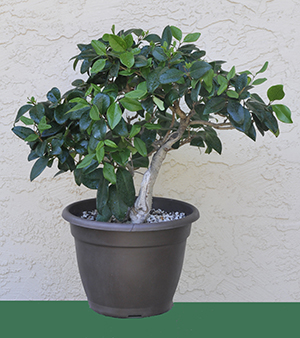
Eventually the forest no longer fit in a bonsai pot, so I took it apart and planted individual pieces separately. See if you can find the separated tree in the bonsai pot before separation. It has no black spot now; I don’t water the leaves any more. I grow it in the shade as most bonsai in San Diego do better in some shade–morning sun only–or full shade. Full shade causes the leaves to darken as they increase chlorophyll to offset the reduced sun. In the ground, they do very well in full sun.

While I did take the forest apart, it was not before I developed it to my satisfaction. Please see the final photo. The forest is just beginning to bud out; you can see the ramification that can be achieved with use of the clip-and-grow method.