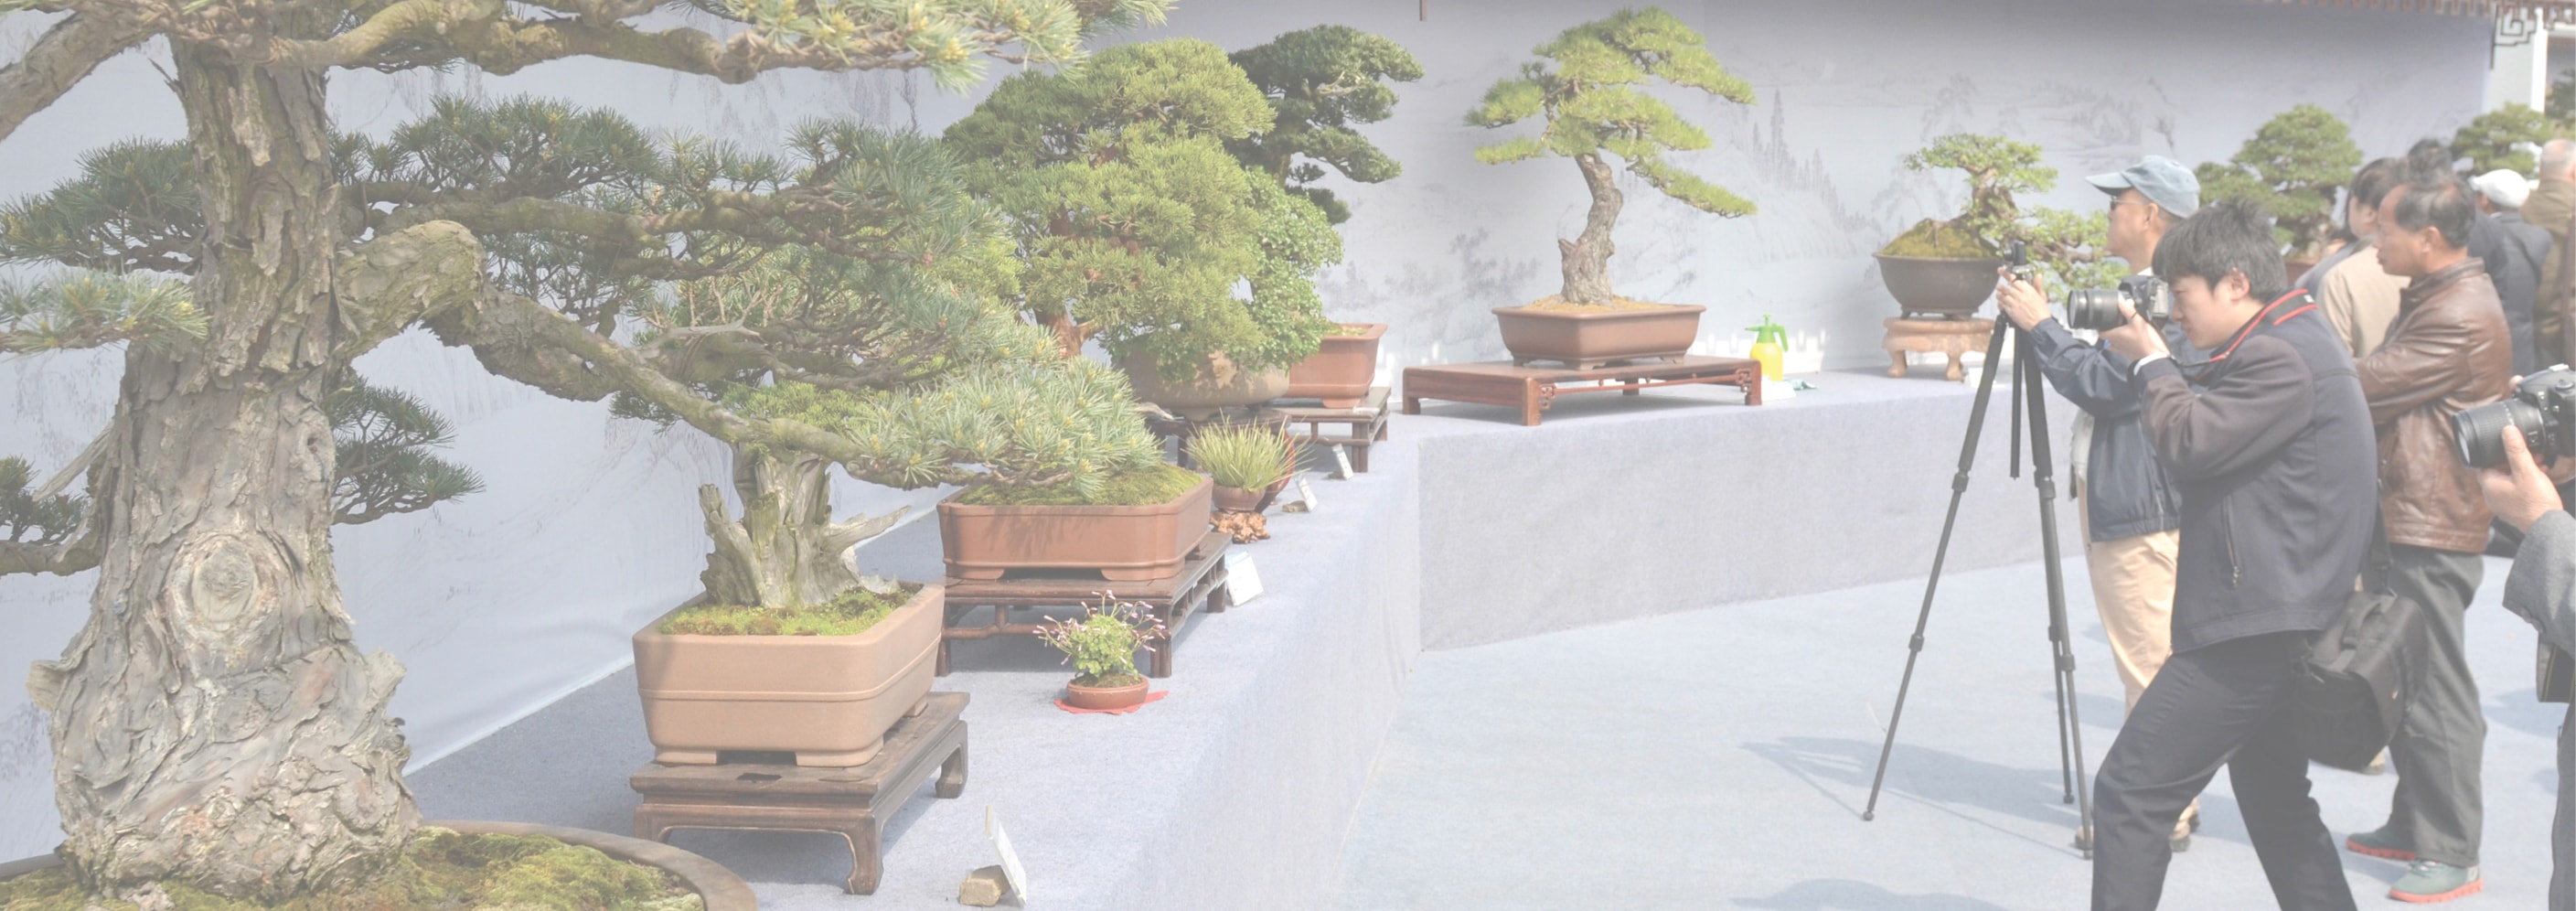
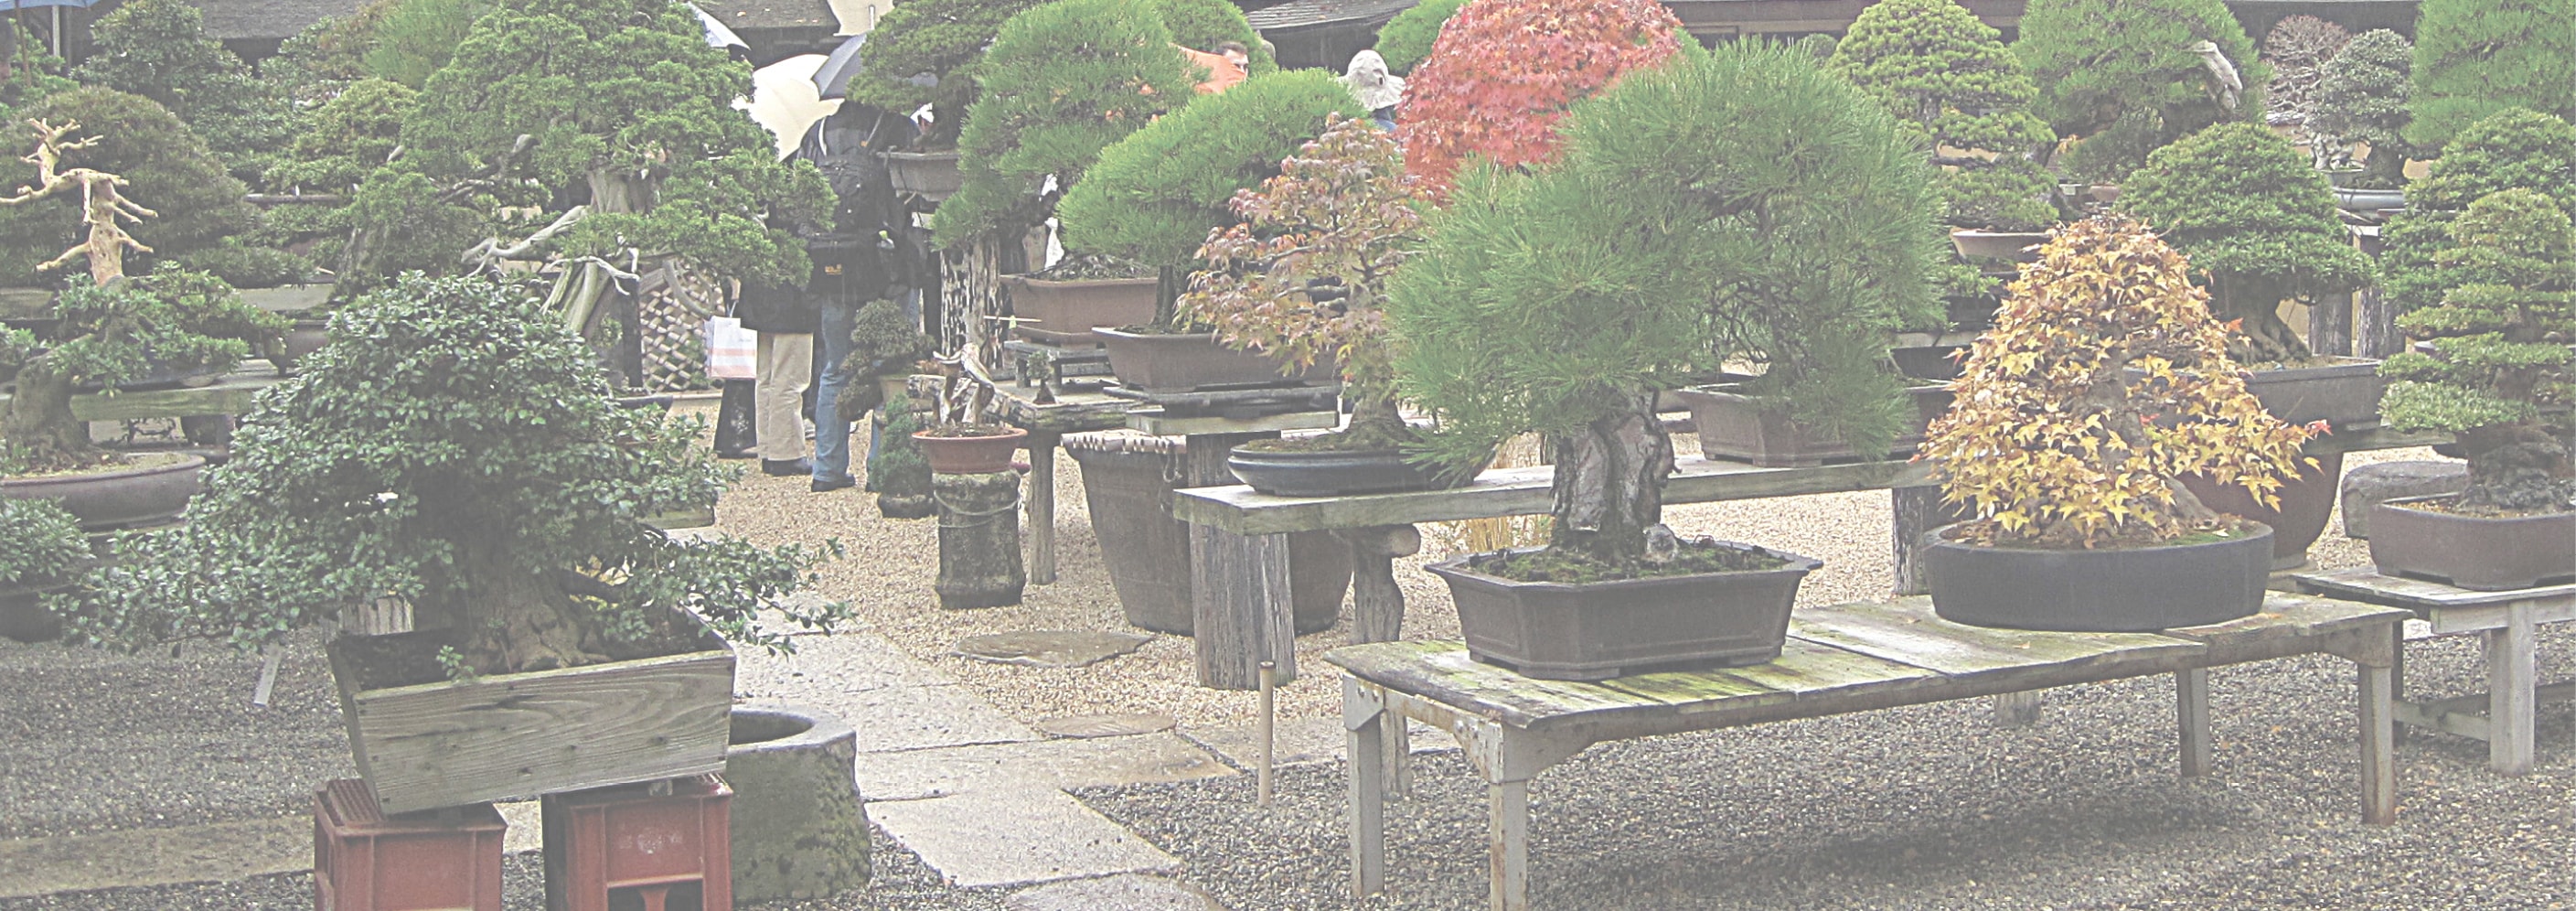


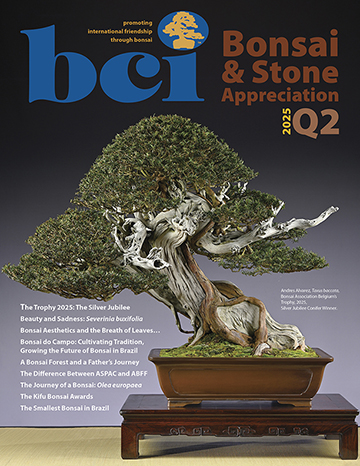
BCI Store, Events & News


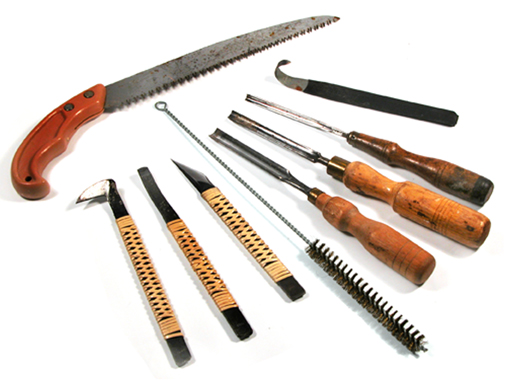
TAKE CARE OF YOUR TOOLS!
by Bill Sullivan
The following electronic reprint was posted to the Internet by the Golden State Bonsai Federation, a federation of over 60 Bonsai clubs in the state of California. It was posted by Michael Greenstein [greenste@AOL.com].
Before beginning to recondition or to sharpen your tools, you should have on hand:

Cleaners:
1. Soap and water, rubbing alcohol, Clorox, WD-40, and/or lighter fluid.
2. Rust eraser.
3. Wire brushes (hand and power).
4. Steel wool.
5. Fine emery cloth, wet/dry.
Sharpeners:
1. Water or oil stones(coarse and fine). Water stones need to be well soaked.
You will need both flat and round stones.
2. Honer (porcelain knob and tube insulators are great).
3. Power brush and grinder.
4. Hand files (coarse and fine).
5. Vise
Reconditioners:
1. Ball peen hammer and anvil (or piece of heavy metal).
2. Naval Jelly (follow instructions; use mask and safety glasses).
3. Gun Blue (Minute Man cold chemical; follow instruction).
4. Plastic Dip (PDI).
5. Light oil (Three-In-One).
If you clean your tools after each use, they should never need major work. Tools should be cleaned thoroughly with soap and water or rubbing alcohol after each use, and then dried carefully. A Clorox mix can also be used to clean and sterilize. WD 40, (a rust preventative oil) and lighter fluid are good for removing the "gook" from the cutting surfaces of the tools left by pines, ficus, and other plants which exude a sticky sap. Always dry your tools and oil lightly after each cleaning.
Sharpen and Repair
When it becomes necessary to sharpen or repair your tools due to use or misuse, then by following the instructions given, you can return the tool to a serviceable condition. There is no sense in massacring your five-hundred dollar tree with tools that are not in good condition.
The appearance of a rusty tool can be materially improved by the use of a "Rust Eraser." This product will remove rust and polish up your tools after initial heavy cleaning. This is a new, but highly effective device which may be purchased through several dealers. Naval Jelly is used for the removal of heavy rust, and will also provide an element of protection. Following the manufacturer's instruction, it is wise to use gloves, mask and safety glasses. Be sure any residue is carefully washed and rinsed away. For the removal of especially heavy rust, sandpaper or wire brushes should be used. Steel wool is effective, but hard on the hands. Power wire brushes are great for both cleaning and polishing. I cannot stress too strongly that safety glasses and masks should be worn when using caustic materials or power tools.
Study your tools carefully before doing any sharpening. There are bypass blades, anvil, beveled, and blades that meet, but are beveled inside and out. Stainless steel tools are difficult to sharpen, because they are so hard. Be sure to check the manufacturer's angle of any tool before you start. That angle is the one you want to maintain.
Sharpening stones need to be smooth and flat when used. A worn stone with curves or waves is worthless. A wooden block with raised ends will elevate your stone, hold it firmly, and save your knuckles. A "stop" should be secure to one end of the block to keep the stone from sliding off the work bench. Oil and water stones both do the same thing, remove metal in such a way as to provide a sharp cutting edge. Heavy work, such as removing a nick in the blade, should be done with coarse or medium stones, and the finishing touches can be done with the fine stone. A tungaloy carbide sharpener can be used, but this cuts away excessive amounts of the metal, and should only be used sparingly. Be sure to clean stones after each use.
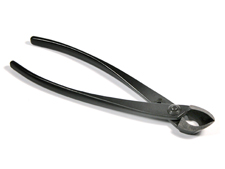
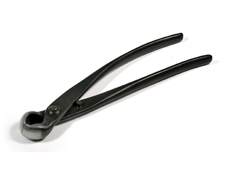
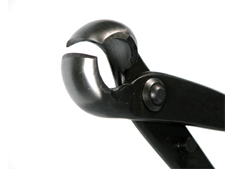
In sharpening bypass blades, you are removing metal from the cutting edge, so use pressure only on the forward strike, beveled side down against the stone. Do not attempt to correct the "overbite" of concave tools! With anvil blades, sharpen only the top blade, which is beveled on both sides. Use the same procedure as: before, but remember to do both sides. Concave cutters are sharpened on the inside only. Lightly roll the outer concave surfaces against the stone, one side at a time. The interior surfaces should be sharpened with a round or half-round stone, and finished with a honer. The honer does not sharpen; it just smoothes the surfaces. Tools with blades that meet, like root pruners, may need to be adjusted for proper closure by filing the stop pin just enough to allow the blades to touch. Wire cutters need to be sharpened on both sides, but because the blade movement is so restricted, it is best to use a fine file. Use the file cautiously. If you remove too much metal, they will not close properly.
Power grinders should only be used for "heavy" removal of metal, although the experienced craftsman could use it for fine work. Be sure the tools you are sharpening do not get hot! Heat removes the temper, rendering a tool "soft" and incapable of holding an edge. A vise is essential for holding most curved-bladed bonsai tools while working on those angles. Left-handed tools are hard to find and require special care.
If you need to adjust the rivet to keep the closing tension tight, it may be tapped lightly with the "peen' side of the hammer. For best results, the tool should be held firmly against an anvil or piece of heavy metal. If the closing joint is too tight, work an abrasive material, like Liquid Wrench into the area by moving the handles back and forth.
Reconditioning the metal color
Gun Blue renews the surface look and provides rust protection. It can only be used on areas that have been completely cleaned. Not even a fingerprint can remain. I suggest that cleaning solution be used to decrease the metal before applying the bluing solution. The "blue" can be painted on with a Q-Tip swab, covering the exposed metal parts. Follow the package instructions and avoid skin contact. To give a better "feel" to the tool, the grip area of the handles can be immersed in "plastic dip." Follow the package instructions carefully. After dipping a handle, turn it rapidly up and down, up and down, to keep a glob from forming at the tip. This dip protects the metal, provides a cushioned grip, and (because it comes in at least seven colors), helps in tool identification. Probably no more than two coats of this material is necessary. Use the Gun Blue before you dip the handles.
After cleaning, sharpening and reconditioning tools, they should be oiled lightly. Excess oil should be wiped away. Regularly cleaned and oiled tools will not rust! Who can work in bonsai without getting their tools wet and dirty? Properly cared for and sharpened, your bonsai tools can remain serviceable for decades.
Edited for the Internet by Thomas L. Zane
Bonsai Pots
A bonsai pot is not just any pot! A bonsai pot serves a function beyond merely containing the tree and the potting medium. It is an integral part of the bonsai image, and must complement the tree in much the same way as a frame complements a painting.
Bonsai pots:
-are very beautiful, an art form requiring highly skilled artists.
-are much more shallow than regular plant pots, hence the frequent reference to bonsai ‘trays.’ 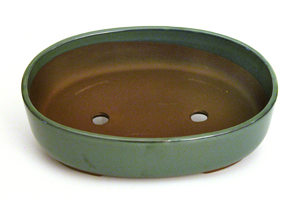
-are stoneware or ceramic, as opposed to the common earthenware flower pots. They have been fired to much higher temperatures, and thus are much more hardy.
-have huge drainage holes. These ‘25-cent-piece’ sized holes must have mesh screening in place over them to prevent the soil from running out the bottom of the pot.
-have feet, which raise the pot bottom from the bonsai bench, allowing draining water to run freely away. Their feet may be plain and straight, or curved and fancy.


Bonsai pots may be an unglazed, rich brown in color, or glazed to soft, subtle colours such as green, grey, blue, cream, or warm white. In shape they may be
round, square, octagonal, oval, or oblong. Their profile may be straight-sided, lipped, flared, or incurved.


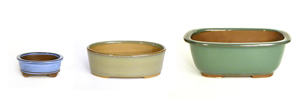
A bonsai pot may be as small as a teacup, or even a thimble, or as large as a baby’s bath. Traditional, established guidelines help bonsaiists select the appropriate size, shape and color to best complement each tree style and species.
Pots for cascade and semi-cascade bonsai are, of necessity, much deeper, in order to balance the downward sweep of these two styles.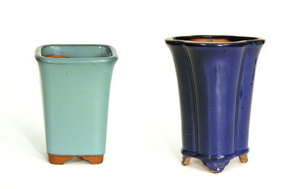
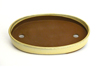
Until bonsai are ready for such fine pots as described here, but after they have been 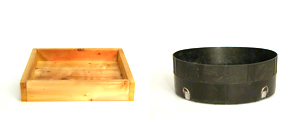
collected from the wild or lifted from the garden, they can be planted into ‘training pots’. These can be as simple as seed trays or even shallow wooden boxes lined with screen, as long as they are free draining. Training pots must be shallow, to encourage the tree roots to develop horizontally.
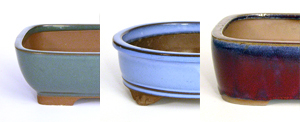
Beginners should beware of poorly-made pots, especially those with uneven bottoms, hollows in the feet, or carelessly made drain holes. All of these are serious flaws, as water may collect or be prevented from draining freely, causing root rot— one of the most common causes of tree mortality.
|
Bonsai pots:
-have feet, which raise the pot bottom from the bonsai bench, allowing draining water to run freely away. Their feet may be plain and straight, or curved and fancy. Bonsai pots may be an unglazed, rich brown in color, or glazed to soft, subtle colours such as green, grey, blue, cream, or warm white. In shape they may be round, square, octagonal, oval, or oblong. Their profile may be straight-sided, lipped, flared, or incurved.
A bonsai pot may be as small as a teacup, or even a thimble, or as large as a baby’s bath. Traditional,established guidelines help bonsaiists select the appropriate size, shape and color to best complementeach tree style and species.
Pots for cascade and semi-cascade bonsai are, of necessity, much deeper, in order to balance the downward sweep of these two styles.
Until bonsai are ready for such fine pots as described here, but after they have been collected from the wild or lifted from the garden, they can be planted into ‘training pots’. These can be as simple as seed trays or even shallow wooden boxes lined with screen as long as they are free draining. Training pots must be shallow, to encourage the tree roots to develop horizontally.Beginners should beware of poorly-made pots, especially those with uneven bottoms, hollows in the feet, or carelessly made drain holes. All of these are serious flaws, as water may collect or be prevented from draining freely, causing root rot— one of the most common causes of tree mortality. |
A bonsai pot is not just any pot! A bonsai pot serves a function beyond merely containing the tree and the potting medium. It is an integral part of the bonsai image, and must complement the tree in much the same way as a frame complements a painting.
Bonsai pots
Are very beautiful, an art form requiring highly skilled artists.
Are much more shallow than regular plant pots, hence the frequent reference to bonsai ‘trays.’
Are stoneware or ceramic, as opposed to the common earthenware flower pots. They have been fired to much higher temperatures, and thus are much more hardy.
Have huge drainage holes. These ‘25-cent-piece’ sized holes must have mesh screening in place over them to prevent the soil from running out the bottom of the pot.
 Have feet
which raise the pot bottom from the bonsai bench, allowing draining water to run freely away. Their feet may be plain and straight, or curved and fancy.
May be an unglazed, rich brown in color
 Bonsai pots may be an unglazed, rich brown in color, or glazed to soft, subtle colours such as green, grey, blue, cream, or warm white. In shape they may be round, square, octagonal, oval, or oblong. Their profile may be straight-sided, lipped, flared, or incurved.
Small as a teacup
A bonsai pot may be as small as a teacup, or even a thimble, or as large as a baby’s bath. Traditional, established guidelines help bonsaiists select the appropriate size, shape and color to best complement each tree style and species.
Balance the downward sweep of cascades
Pots for cascade and semi-cascade bonsai are, of necessity, much deeper, in order to balance the downward sweep of these two styles.
Training pots must be shallow
Until bonsai are ready for such fine pots as described here, but after they have been collected from the wild or lifted from the garden, they can be planted into ‘training pots’. These can be as simple as seed trays or even shallow wooden boxes lined with screen, as long as they are free draining.
Training pots must be shallow, to encourage the tree roots to develop horizontally.
Beginners should beware of poorly-made pots, especially those with uneven bottoms, hollows in the feet, or carelessly made drain holes. All of these are serious flaws, as water may collect or be prevented from draining freely, causing root rot— one of the most common causes of tree mortality.
Bonsai Tools
Bonsai tools are specialized tools which have evolved over hundreds of years with the art of bonsai. Good quality tools are made of forged, high-carbon steel to hold a sharp edge and will provide a lifetime of service if used and cared for properly.
Tools used for Pruning:
Leaf Pruners are used to defoliate trees. Their spring loaded action makes it easy to cut off each leaf at its petiole (stem)
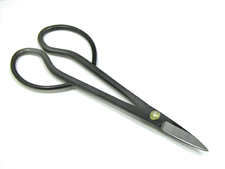
Shears (Light weight) come in various sizes and are used to cut everything from buds and leaves to stout branches and roots. Their long handles allow access to the interior of a tree without disturbing the outer branches.
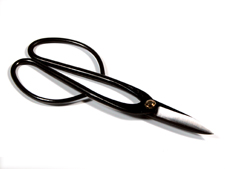
Shears: Medium weight
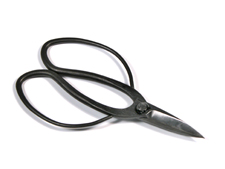
Shears: Heavy weight
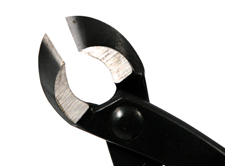
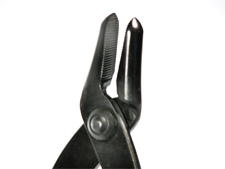
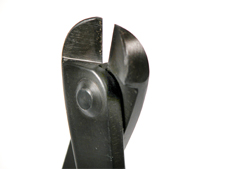
Concave Cutters come in three sizes and are used to cut branches. The angled, concave blade leaves a clean, hollow cut which heals more easily and leaves less of a pruning scar.
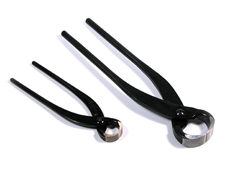
Knob Cutters or Spherical Cutters also come in three sizes and are used to cut branches at their base. These cutters leave a deep, hollow cut allowing the bark to heal with minimal pruning scar.
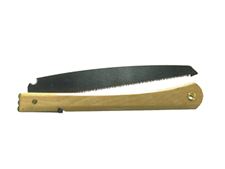
Saws are convenient when branches are too thick for Concave Cutters. Japanese pruning saws cut on the pull stroke for better control.

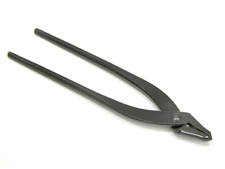
Root Cutters or Splitters come in three sizes and are used primarily to cut tough, fibrous roots, split branches and remove wood.
Tools used for Wiring:
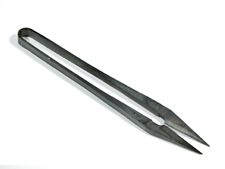
Pliers are used for bending and holding heavy wire when wiring branches. They can also be used to tear deadwood wood on branches when creating a jin.
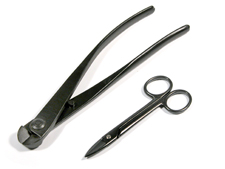
Wire Cutters: small, medium and heavy are used to cut wire from 6mm to 1mm thick. Their special shape allows for the removal of wire from branches without damaging the bark or branch.
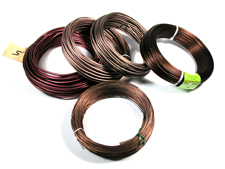
Bonsai Wire, made from anodized aluminum, comes in eight different thicknesses, from 1 mm to 6 mm in diameter. Conifers are usually wired with copper wire.
Tools used for Potting:
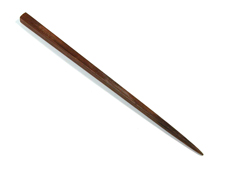
Chopsticks are inexpensive and extremely useful in teasing away soil from the root ball. They are also used to auger soil in between roots when potting a tree so as to leave no air pockets or cavities.
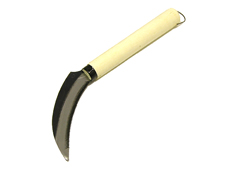
Scythe: The scythe can be used to separate a root bound tree from its container. It can also be used to saw through roots, especially overgrown sod-like root pads.
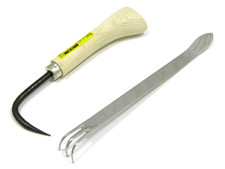
Root Hook and Root Rake are also used to comb out roots. The spatula on the Root Rake can be used to tamp down soil or separate a root-bound tree from its container.

Soil Scoops are a convenient way of adding soil to the container when potting a tree. Their angled spout allow pouring the soil where needed without bumping into the trunk or branches.
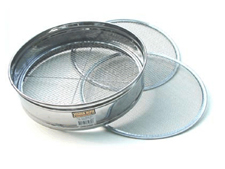
Set of Sieves:
Small (1/16” or 1.5 mm openings) Medium (1/8” or 3 mm openings.) Large (1/4 “ or 6 mm openings). These sieves are used to sift particles of varying sizes to achieve a consistent, coarse soil mix without the fine particles that can compromise the soil mix's porosity and free-draining properties.
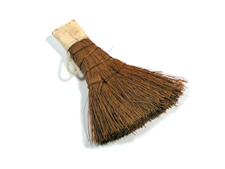
Broom: Use the broom to level and brush away excess potting medium.
Tools used for Carving:
Splitters, Pliers, Knives, Scrappers, Wire Brushes, Gouges, Electric Rotary Grinders
All these tools and more, are used to carve deadwood when creating jin, shari, saba miki and driftwood.
Care and Maintenance of Bonsai Tools
• Examine your tools regularly.
• Don’t use tools for a purpose for which they were not designed.
• Never twist or turn a tools while it is being used.
• Try not to drop your tools on hard surfaces like concrete or stone.
• Don’t use your finely sharpened shears to cut roots that are in the soil. Particles of soil can dull and nick.
• Do not overload a tool. Instead make a series of smaller cuts or usealarger tool.
• Tools should be sharpened by a specialist.
• Clean your tools when finished. Alcohol or turpentine will remove sap.
• Apply a light coating of oil to surfaces and pivot point.
• Store in a dry, clean place where they will not be damaged by contact with each other or other objects.
BCI Education Committee
|
Chen Chang (Chair) China |
|
Sujata Bhat India |
|
David DeGroot USA |
|
Min Hsuan Lo Taiwan |
|
Bhavna Shah India |
|
Enrique Castaño Mexico |
|
Piotr Czerniachowski Poland |